How to Upgrade IOS Image on a Cisco Router/Switch?
There are a couple of pieces to this puzzle. Here is a list of things you need to successfully perform this operation:
1) Router or a Switch you would like to upgrade
2) Console Cable
3) Straight Through Ethernet Cable (CAT5)
4) PC
5) TFTP Server (http://www.solarwinds.com/products/freetools/)
Here is a step-by-step of what needs to be done to perform the upgrade:
1. First of all, you would need to connect your Console Cable's RJ-45 end into the Router's or Switch's Console Port.
2. The other end of the Console Cable that has a DB9 Connector needs to be plugged into the Serial Port of the PC.
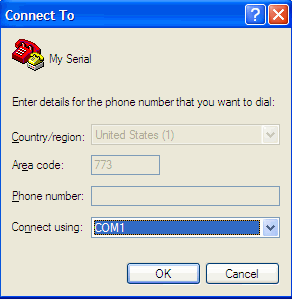
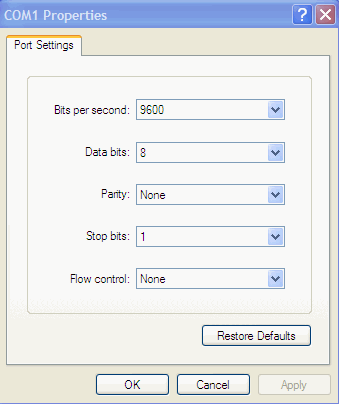
3. Now open up your favorite program to launch the console. Or you can use Hyper-terminal (comes free with Windows). Here are a few snapshots of Hyper-Terminal settings to get you started:
4. Once you are done. You should be at a user prompt followed by a ">" sign. Now type in "enable" to get to the "#" prompt, also known as exec prompt.
5. Now, the other important piece of the puzzle you need to focus on is running a TFTP Server on your PC. Once you have the software downloaded as mentioned above, you can then go ahead & launch it.
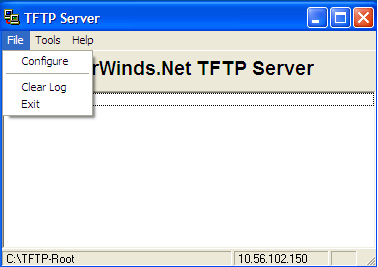
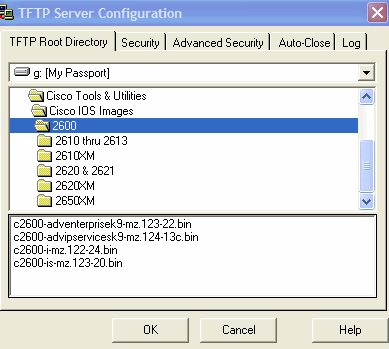
6. Once the TFTP Server is running on a PC. Make sure you point the path on the Server to the appropriate IOS image. Here are a few snapshots of the SolarWinds TFTP Server config:
7. Now, the last piece of the puzzle is the Ethernet Connection between the Router/Switch & PC. Connect any of the available ethernet/fast-ethernet ports on your Router/Switch to your PC's Ethernet Port via a CAT5 cable. Make sure it’s a straight-thru cable since you are connecting two dislike devices.
8. Now assign a manual IP address on each end of the Ethernet Connection. For Example: on the PC, assign 10.10.10.1 /24 & on the Router/Switch, assign 10.10.10.2 /24. Once done, try pinging either from your PC's command prompt or your Router/Switch's CLI mode via the Hyper-Terminal or any Terminal program of your choice.
9. Here is the final step: type in the following command under exec prompt: Router#copy tftp: flash: hit enter Address or name of remote host []? Here you have to type in your TFTP Server's IP address, which happens to be the same as your PC's IP address.
10. Then ok all the way & the image push should start immediately.
11. Once the image is done pushing & you get a message indicating that the IOS image push was successful. Make sure you see the image on the flash. You can check this by typing in "show flash" under exec prompt.
12. And last but not least, don't forget to REBOOT. Reboot is what forces the router to initialize the new IOS image. You can reboot the Router/Switch via the "reload" command under the exec prompt.


